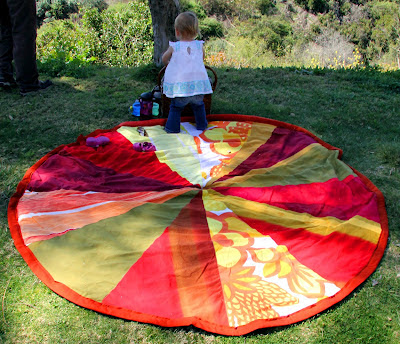
This weekend project was made possible by a great fabric sale I stumbled upon at Crate & Barrel outlet store.

Their remnant fabric bolts that were originally $35 a yard was only 95 cents a pound! I bought about 6 pounds worth (probably around 10 yards or so), made a picnic blanket this weekend and have enough to make a matching lunch tote later.
I got the idea for this picnic blanket from the book, Sewing Green by Betz White:
 The book called for an old vinyl table cloth for the back and terry cloth for the front, but I didn't have a vinyl table cloth and didn't want to go out and purchase one. Instead, I used an old fleece blanket that we weren't using any more for the backing and my new Crate & Barrel fabric for the front.
I folded the blanket into fours, divided each quarter section by three and cut out my wedges to that size from my remnants. After cutting all the wedges, I sewed them together. Once the front was finished, I lined it up to the backing and worked on how I was going to get a perfect circle with the sunburst pattern centered. I decided to attach a safety pin to the center of the front face and a string (as long as the radius) attached and moved the string around the  blanket, cutting wherever the end touched.
For the binding, I just made some double bias tape to finish the project off. It was a beautiful day today, around 75 degrees and sunny, so we decided to use the picnic blanket today with a great picnic at the park down the street.


